top of page
Ooi Kai Yang
Computer Application
Assignment 1
 1.jpgStart draw plan and elevation with autocad |  2.jpgPlan of my Sem 2 final project |  3.jpgwith right elevation |
|---|---|---|
 4.jpgwith front and left elevation |  5.jpgcolour the layer to easier see the line |  6.jpgdrawing the base or ground line |
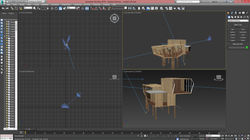
 7.jpgat first want use 3ds max do the modeling but really not good at it |  8.jpgSo I change to Rhino to make the model |  9.jpgStart build the wall and slap |
 10.jpgthe stair |  11.jpgMaking column of the building |  12.jpgmake the model according the plan |
 13.jpg |  14.jpgmaking the roof |  15.jpgperspective view for now |
 16.jpg |  17.jpgdoing the second storey of building |  18.jpgthe frame of window |
 19.jpg |  20.jpgfill in the surface as window and will add the glass material |  21.jpgmove out the elevation to draw line as I always draw the line to another elevation |
 22.jpgcomplete the fence of the building |  23.jpgcomplete drawing and modeling on rhino |  24.jpgimport to 3ds max |
 25.jpgputting the material colour |  26.jpg |  27.jpgput the different colour with different material |
 28.jpgComplete colour |

top.jpg

Right .jpg

Perspective.jpg
top.jpg
1/6
The rendered view of the model but some colour are missing during rendering view.
Project 2A
Exterior render
 0.jpgImport from rhino to 3ds max |  0.1.jpgput UVM map first then put the material download from internet |  0.2.jpgStart put other material to make floor |
|---|---|---|
 1.jpgputting daylight and camera view |  2.jpgcreate noise for grass panel |  3.jpgadjusting camera lens |
 1.jpgputting sky portal |  2.jpgadjust texture from UVM map |  9.jpgtry render |
 4.jpgpreview render for make sure the sun light |  7.jpgrendering second view | 9.jpgrendering |
 10.jpgsave as TIFF file and put alpha chanel |  11.jpgchange sky layer |  12.jpgput tree inside |
 13.jpgcreate shadow |  14.jpgput human figure |  15.jpgfor second view I change to black and white for easy to delete background |
 16.jpgUsing colour range can delete detail easy |  17.jpgput model into background |  18.jpgput human figure inside and create shadow |
 19.jpgchanging material colour |


Work in progress
Render 1
Render 2
Project 2B
Interior Rendered
 3.jpgadding target light |  4.jpgadjust intensity and kelvin |  5.jpgfirst try of putting furniture |
|---|---|---|
 12.jpgcopy the lighting source and target light |  11.jpgAdding ies file or photometric web light |  6.jpgfinal rendering for this scene |
 8.jpgput to photoshop and change the background |  7.jpg |  13.jpgsetting the sky portal and choose which one is not visible to rendered as some might cause the object can't be seen when after rendered |
 1.jpgrendering |  2.jpgfound that some object disappear so disable some sky portal |  9.jpgchanging background in photoshop |


work in progress
Rendered 1
Rendered 2
 1.pngSetting camera path way |  2.pngDisable some skyportal as it make the building disappear while rendering |  3.pngSet the key frame |
|---|---|---|
 4.pngTest rendering 1 but cancel it because part of building disappear |  5.pngRendering |  7.pngEditing video add some transition and music |
 8.pngFinal checking for editing. |
Project 3 : Animation
bottom of page